Pages

Sunday, June 30, 2013

Where did I go!?

I realized that I had not posted anything in a while, but hadn't realized that it had been QUITE so long! Although, the last time I posted coincided time wise with when I went from working 12 hours a week to full time, so it shouldn't surprise me. 

I used to work for a large corporate office of a massive retail chain. My last position with that company was as a project manager for a huge project.  I loved what I was doing, I did it well. Prior to that I was in system support for that company and through my adult career I held the same position for a couple other large companies. 
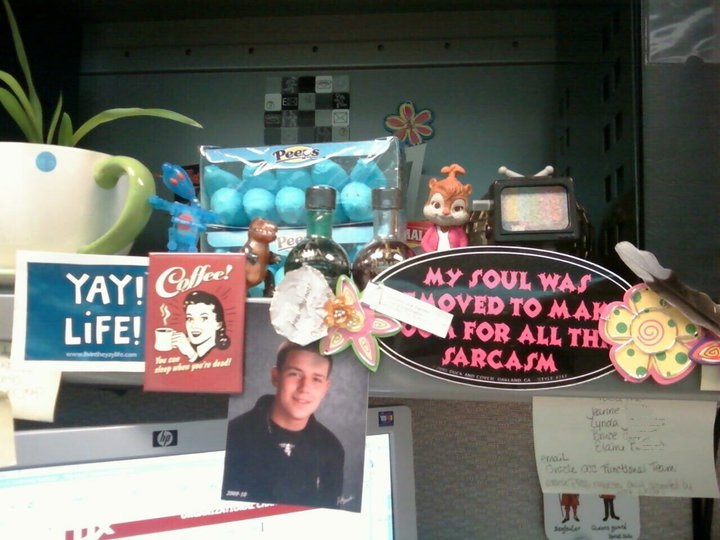
I tried to surround myself with happiness at work

In December of 2010 I found myself sitting at my desk crying and realized "No one is financially dependent on me anymore, why am I still doing a job I never wanted??"  When I went to college right out of high school (Actually, I was still in high school when I went to college overlapping my senior year of college and my freshmen year of high school) I was a biology major, theater minor.. and I then spent the next 20 years of my life sitting in front of a computer. I had stayed in that position through horrible bosses, 2 hour commutes, and other unhappy situations because I was a single mother and needed to keep a roof over my kids head. That was no longer the case.... I realized I could be free!

So, (keep in mind the economy at the time and you will realize how horrible my work situation was.. actually like I said, I liked what I did... just NOT for who I was doing it for) I quit my job, gave up my apartment and car..... and went and hiked the Appalachian Trail obviously. 

Long distance hiking is something I honestly believe everyone should do at least once in their life. It doesn't have to be a massive distance... just be out in the woods.... with your thoughts.. and everything you need on your back for oh.. a long weekend. It puts everything in perspective. You realize the important things in life. Where is the next water source, and is it going to rain. Not who said what to whom, and what someone was wearing, and if a report might be a day late.... much less that you are stuck in commuter hell traffic and  might be 3 minutes late to work even though you worked 50 hours already that week.  

After hiking the Trail (I made it 850 miles before deciding to come home) my life was extremely different. I paired my life down to the essentials. I moved back into an apartment in my mother's house and worked at a friend's restaurant. My only bills were my cell phone and helping my mother with the electric. I then worked part time at a small tax office for tax season. One of the perks there was that they did my tax return. Lo and behold when you used to have a pretty high tax bracket and only worked 1/4 of the year.... you get back a LOT in taxes! I took the rest of the year off and just did a few things here and there to make some pocket money. This lasted through the summer and into the fall. Although, my Awesome August Adventure (I'm sure I will have to blog that one now) pretty much took up the bulk of my money reserves and I decided it was time to go back and get a job. 

I ended up finding a part time position as a receptionist at an outpatient mental health clinic. Nothing I thought I would ever do. I started out working 12 hours a week and am now full time. I love it. I love the people I work with. I love the work I do. I love the people I deal with. And most of all, I love who I work for. I can honestly say I am friends with everyone I work with. I don't go a week without thinking to myself  "I love my job!"  I make a fraction of my previous income, but my stress is even smaller than that!  

Anyway, that is where my time has been going. I have been documenting adventures over the past 6 months with the intention of blogging them, so hopefully I can catch up! 

Friday, January 18, 2013

Let's play "Chopped!"

I always hit the discount sections of the supermarket. My favorite is the discount produce rack. My market always (usually...) has a great supply of fruits and veggies that might not be "pretty" enough to be displayed on the shelf, or might need to be eaten in the next couple days. Between my dehydrator, juicer, canning, and soups, I have no problem taking many pounds of peppers, apples, mushrooms, etc off their hands at a great price! (usually they have perfect apples on there for $0.49/lb! Even organic apples!)

Anyway, my market also has a discount dairy shelf, bakery, grocery, deli and even meats.  I have decided lately, that instead of thinking to myself... "Hmmm, I think I will make this particular thing for dinner."   I allow the discount racks to dictate my ingredients for what I am going to make. Today was a great windfall!  Not a lot of produce (that makes me sad as I was hoping to resupply my dried apples) but there was hamburger for $1.49 lb! I had also found a dozen organic eggs for $1.50 and a large can of tomatoes for 50 cents. This of course made me think.. " I do believe I will be making a meatloaf for dinner!" I had also seen breadcrumbs on the rack, but on second check, it was cheaper to buy a discount loaf of italian bread for $1 and then I could make my own breadcrumbs. 

I got home and sliced the Italian bread, put it all onto cookie sheets in a single layer in a 300° for 15 minutes, then turning and giving it another 15 minutes. Then I tossed them into my food processor and pulsed them down into bread crumbs!

I decided to go with this recipe for meatloaf. It looks interesting. I will update with reviews from myself and the man. 

For dessert, I am going to make strawberry shortcake! My boyfriend had just said last night that strawberry shortcake was one of his favorites, but with the strawberry filling type strawberries instead of fresh. There happened to also be cans of strawberry pie filling on the discount rack!  He was adamant that it be with the biscuit type shortcake instead of the sponge cake type cake. So, I decided I will make my biscuit recipe I have had made since I was a teenager. 

Sky~High Biscuits


  • 2 cups all-purpose flour
  • 1 cup whole wheat flour (or just another cup of white)
  • 4½ tsp baking powder
  • ½ tsp salt
  • ¾ tsp cream of tartar
  • ¾ cup COLD butter
  • 1 egg beaten
  • 1 cup milk (I used vanilla almond milk)


In a bowl combine the flours, baking powder, salt, and cream of tartar. 
Cut in the butter until the mixture resembles coarse cornmeal.
Add egg and milk, stirring quickly and briefly. Knead lightly on a floured board. 
Roll or pat gently to 1-inch thickness. Cut into 1-2 inch biscuits. Place in a greased 10 inch iron skillet or 9 inch square pan. For crusty biscuits, separate on a cookie sheet. Brush the top of the biscuits with milk.
Bake at 450° for 12 to 15 minutes. 


Friday, January 4, 2013

PASTA!!

Last week I found this pasta machine in a thrift store for $9.99. I HAD to get it since it is normally sold for about $90. Today was pasta day!  

I had was out of white flour and so I used whole wheat and spelt. I made a ring of 2 1/2 cups of whole wheat and 1 cup of spelt. Then broke 4 eggs into the well and sprinkled about a teaspoon of salt on it. Mixed up the eggs in the well slowly incorporating the flour until I was able to make it into a dough ball. I kneaded the ball for about 5 minutes, trying to make sure not to let it get too tough.  I had a lot of flour left (and made another couple of 1 egg batches).  I then flattened it out with a roller (flouring it as needed ) and fed it through the pasta maker. I cooked some right away for about 4 minutes in boiling water. It worked! I was amazed! And now I have a whole bunch of pasta made up and drying. I am going to try a gluten free batch next :)

Wednesday, December 12, 2012

Chips and Salsa for pennies!

I am huge into hitting the discount racks at the supermarket. The produce rack is my favorite!  Most of the time, the produce it totally unblemished and in perfect condition. I don't know what their criteria is for things like apples, but I would say I have only found about 5% of the apples having something like a dime sized bruise on them. Otherwise I am able to run away with pounds and pounds of honeycrisps, galas, a range of organics, grannys, etc. Most of these apples usually run for about $2.50/lb and I am getting them at 49 cents a pound!  

The other day I came away with 25 pounds of apples for $12.  Then a mixture of tomatoes, lemons,  and avocado's that would normally have been about $30 for just $6.50!

So.. today (my 12/12/12 birthday by the way) is produce processing day!  
Usually I come home and fill my dehydrator with apple slices and make apple sauce, but the tomatoes won't keep as long, so I needed to do something with the 7 pounds of tomatoes I had!  

I decided to throw a bunch into the dehydrator to make "sun dried" tomatoes. I sliced them about 1/4 inch and placed them on the trays, then sprinkled them with a bit of salt and some dried basil. 

I also have a bunch of jalapenos I had picked up last week. I am planning on making chipotle out of them, but need to make a smoker for that and have a full day available to tend them. So, I figured I would use up some of them. I found a recipe for jalapeno salsa.  Very easy!

I took 

  • 6 jalapenos and just cut the stems off (I decided to leave the seeds in order to make a HOT salsa! If you want it more mild, remove the seeds)
  • quartered 6 large tomatoes
  • 4-5 cloves of garlic
  • 1 small onion quartered
  • salt
  • sugar


I  rubbed the peppers and tomatoes with a little olive oil and put them into a couple large glass baking dishes at 400° for about a half hour. Then after they cooled a bit threw them into the food processor with the garlic, onion and about a tsp of salt. I tweaked it a bit with a smidge more salt and a little bit of sugar to cut the acid and Viola! Salsa!

Well.. now I needed something to have the salsa with.... and sooooooo I made corn chips! I couldn't believe how easy these were. 


  • 1 cup of cornmeal
  • 1 Tbsp oil
  • 1/2 c boiling water
  • salt to taste (about 1 tsp)


  I spread this out on a parchment lined cookie tray and placed another piece of parchment over it so I could smish it really thin.You may need to add more corn meal, or more water to get it to a spreadable consistency.  I scored it into corn chip shapes, then baked at 400° for about 10-15 min. I did one batch that wasn't quite thin enough and they didn't quite get crispy. 

Turned out to be pretty good if I do say so myself!  Salsa (like granola is something you can play with. You can make it chunkier, smoother, add green or red bell peppers, maybe red onion. I wish I had some chipotle to add to it! Have fun with it 

Saturday, December 8, 2012

Teaberry (Wintergreen) Muffins and Tea

I spent a couple hours yesterday tromping around the woods gathering teaberry berries and leaves with the intent of making muffins and tea. 

At first, I had my plan that I would gather the required 1 cup of berries on my way out into the woods, then I would gather leaves on my way back. After I had gathered about 3/4 cup of berries, I realized, I really should be gathering the greens at the same time!

So.. I have determined the most efficient way of gathering teaberry.  Basically, when you see a berry (which is relatively few and far between compared to the vast landscape of greenery).. just pull the whole thing up!  These plants will definitely NOT suffer a loss if they are pulled up by the root. I originally just tried to pull the leaves along with the berry, but inevitably the whole plant would come up most of the time. I found that if I just put the plant stem between my cupped fingers and pulled up, I could strip off the green along with the berry. This turned out to be quite efficient and I was able to gather enough leaves and berries to make a large batch of tea and muffins. 

My page on teaberry will help you to identify the plant and give you information about the benefits if you want to attempt these adventures yourself. 


In order to make a medicinal tea:


Fresh leaves have to be fermented in water to develop the wintergreen in them. Pack a jar loosely with fresh leaves and cover it, set it in a warm place for several days until the water is bubbly. Warm the tea by setting it in a pan of hot water. This will be a strong, good-tasting minty tea. The leaves can be strained out and dried in order to use for a tea that won't be so strong. I will be putting them into the dehydrator to make a nice supply!


The muffin recipe I ended up with is:


  • 1 cup oat flour
  • 1 cup quinoa flour (you can create both of these yourself. I use my grain mill, but you could use a food processor or a coffee grinder)
  • 4 teaspoons baking powder
  • 2 Tablespoons sugar
  • 1/2 teaspoon salt
  • 1 beaten egg
  • 1 cup vanilla almond milk (you can use your preferred milk whether it be cow, soy, etc)
  • 3 Tablespoons vegetable oil
  • 1 cup washed teaberry berries
Mix flours, baking powder, sugar and salt. In separate bowl mix egg, milk and oil. Add dry ingredients to wet and mix well. (if you use quinoa flour I suggest letting it sit a bit to give the quinoa a chance to soften up a bit) Fold in berries. 
Fill greased muffin tins 3/4 full and bake for 20-25 minutes or until a toothpick comes out clean. 


Oh wait, that's Stephen King. I saw him live last night in Lowell :)
.. He doesn't have anything to do with teaberry.. it's just cool!


Thursday, December 6, 2012

Teaberry! (aka Wintergreen... aaka Checkerberry)

When I was out tromping around The Mashpee River Woodlands the other day, I noticed there was a grand amount of teaberry there.

  I think teaberry is the first wild edible I was ever introduced to. I can't remember when, and for the life of me I can't actually ever remember walking in the woods with my mother, but I KNOW she was the one that pointed it out to me. "It is the flavor of Clark's Teaberry Gum" is what she would always tell me. 

I knew of it as teaberry my entire life. I don't think I ever made the connection to wintergreen until I was going on a backwoods camping trip the week before Christmas 2010 with my buddy "Plane" Dave.  I made a comment about how much teaberry there was around and he said "All I see is wintergreen".  

Teaberry berries can be eaten raw or cooked. They have a kind of waxy wintergreen flavor. I have always remembered finding the berries in the fall and winter and so I thought they were a late season fruit, but when I was on the Appalachian Trail in the summer of 2011 I found them in abundance. I have since then learned that yes, they come out in the late summer and they just hang on!  They are actually better after a frost, and will stay on the plant pretty much until something eats them. I love to snag them as I walk along. It's a lot of fun when blueberries are in season, to pick a few of each and have a festive little red and blue handful. .. ok.. it's fun in my head anyway :)


Teaberry berries have that kind of little star-ish end on them, similar to a blueberry. The fruit is definitely NOT a nice round berry. 

When broken open the berry has a kind of.. dryish, white inside. The only thing I can think of to equate the texture to would be .. like.. well..wet styrofoam, but it's not gross. 

**I feel like I need to make some sort of disclaimer here saying please don't go out and eat wild food without having explicit knowledge of what you are eating.. that being said.. this one is pretty easy to not screw up if you pay attention**

 The leaves can be eaten (and harvested) any time of year. They can be nibbled on raw or made into a tea. Native Americans brewed a tea from the leaves to alleviate rheumatic symptoms, headache, fever, sore throat and various aches and pains. The active ingredient found in the leaves and berries is methyl salicylate, and is closely related to salicylic acid - the forerunner of aspirin. Early medicinal formulas using wintergreen to reduce fever, body aches, and muscular pains, were probably quite effective. Unlike aspirin, a moderate internal dosage of wintergreen will relieve indigestion rather than inducing it.

To make the more medicinal quality tea:
Fresh leaves have to be fermented in water to develop the wintergreen in them. Pack a jar loosely with fresh leaves and cover it, set it in a warm place for several days until the water is bubbly. Warm the tea by setting it in a pan of hot water. This will be a strong, good-tasting minty tea. The leaves can be strained out and dried in order to use for a tea that won't be so strong.


You can make a quick tea just by breaking up fresh leaves and let it steep in hot water. On the Trail, I would treat myself to Teaberry tea when I wasn't having sassafrass (my favorite Trail tea.. hmm.. another blog ...)

I am always looking for things to do with wild edibles.. and in my searches, I came across a recipe for WINE!! (I still have a bottle of my Dandelion wine left from last summer)

I also found recipes for muffins and pies! The muffin recipe only calls for a cup of berries.. I think this will need to be attempted (and tweaked of course for using other than regular flour).


Natural Root Beer: (this totally looks like fun.. but.. 1 1/2 GALLONS of molasses?!?!?)

  • 5 gallons water
  • 1/2 cup dry yeast 
  • 1 1/2 gallons molasses 
  • 1/2 cup wintergreen leaves, rinsed & dried 
  • 1 cup sassafras root bark 

Combine water and molasses and heat just to the boiling point. Remove from heat and allow to stand for two hours. Add the wintergreen, sassafras root bark, and yeast. Stir just until blended. Allow to ferment overnight at room temperature. Strain and refrigerate.


And of course.. wintergreen (any minty thing) crushed and placed at your doorways will discourage insects from intruding.

Wednesday, December 5, 2012

Chewy Granola Bars

I have a friend who's daughter has many many food allergies. She had said she would love to try my granola and then mentioned that her daughter loves granola bars. So... I decided to try my hand at granola bars. Personally, I like the chewy granola bars over crunchy. 

Whenever I try something, I check out a whole bunch of recipes, and then tweak it into what I want to make. One thing I have learned from reading recipes on line, is to read the comments!  I have found soooo many recipes where people comment saying that it is an AMAZING recipe.. but they changed this, this, this and that.  I have literally found a few comments where they changed every single ingredient!  .... ... ... 

Anyway, I decided I would just come up with my own recipe and see how it goes. 

First consideration for this particular recipe is that it doesn't have any nuts, corn (including corn syrup), egg, or coconut. Then, I wanted to keep it wheat gluten free.. so no wheat flour.  And of course I want to keep the refined sugar down. 

So.. here is what I came up with:


  • 4 cups Old Fashioned Oats
  • 1 cup Oat Flour (just grind some oats.. I have a mill.. but you can use a food processor or coffee grinder)
  • 1 tsp baking soda
  • 1 tsp cinnamon (I used freshly grated cause I'm all about cinnamon)
  • ½ cup butter
  • ½ cup apple sauce
  • 1 cup honey
  • ¼ cup brown sugar
  • 1 tsp vanilla
Preheat oven to 325°
Use a 9x13 pan. I line it with parchment (cause parchment ROCKS) but you can either line it with aluminum foil that you then grease, or just grease the pan. But.. lining it is helpful because you can remove the entire pan of bars in order to slice them easier. 

Mix oats, oat flour, baking soda, and cinnamon in a large bowl.

Melt butter, applesauce, honey and brown sugar in a sauce pan over medium heat. Stir, stir, stir until it JUST starts to bubble, then remove from heat and add in vanilla. 

Pour wet mixture over dry and mix it up really well. Let it sit for 5 or 10 minutes to let it really soak into the oats. If you use quick oats you may not need to do this. 

Fold in any add-ins you would like, dried fruits, nuts, chocolate chips etc. I  took some chocolate I had made and just put it on top of half of the tray to see how that would work. 

Press FIRMLY (when I say firmly I mean STUFF IT IN!) into lined pan. If it isn't packed down well, the bars will end up being crumbly. I take another piece of parchment and put it over then push down with something flat and wide.. or even another pan. (I read one review where a woman took another cookie sheet and STOOD on it.... ... ..yeah that's not gonna happen here)

Anyway.. bake for 18-20 minutes (or until it turns golden brown) You can take it out half way and press again if you like.

I smished it again after I took it out cause it seemed to have fluffed a lot. And then I actually kept smishing as it cooled. 

Let it cool about 10 minutes and cut, then let it cool completely. 

They are nice and chewy! Not crumbly at all!  In fact they are a good consistency that can be shaped a bit. So you can wrap them up in wax paper or something and send it off in a lunch box :)


Sunday, December 2, 2012

Granola!

Last night I told my boyfriend that I made granola. He asked "From scratch?" and my reply was "...have you met me?"

Yes, I made granola from scratch yesterday, and today.... I had it for breakfast! It was quite yummy!  


I love that this was a recipe where I needed to also make one of the ingredients :)  I needed oat flour and, I haven't done the jumpy uppy downy happy dance on here yet to share my excitement about my newest acquisition.. but I now have a grain mill!! (jumping up and down clapping hands with excitement)

Personally I like the cluster type of granola that you get in the store. Every time I have had homemade granola, it has been the loose toasted type. But I have always loved that too.... soooo I decided to make them both and mix them!

Granola is one of those fun things you can play with and make it your own. One of those things where you just need to know the basics and you can adjust, add, remove, and enhance all you want. Both in the base cereal part and in the add-ons.  For this batch I used brown sugar and honey, but I am going to try using different mixtures of pure maple syrup, honey, brown sugar. 

I love having a basic granola that is tasty and then adding in whatever fruits I want to.. like a sundae bar. In fact, I am going to create a granola bar that will make morning (or late night ;) creation that much easier. 

Ok.. so in order to make that great cluster chunky kind of granola you will need  to first preheat your oven to 300° (oh and just as a warning.. don't get distracted when you are in the baking/stirring phase.. the browning can go into burning pretty quickly :/  )


  • 2 cups quick oats
  • 1 ½ cups oat flour
  • 2 cups nuts ( I had a mixture of chopped almonds, sliced almonds and soy nuts.. cause that's what I had on hand)
  • 1/2 tsp nutmeg
  • 1 Tbsp cinnamon ( I like cinnamon)
  • ½ cup butter (one stick.. I used sweet cream salted)
  • ½ cup brown sugar
  • ¼ cup honey (cause.. once again.. it's what I had handy)
  • ¼ cup water
  • ½ tsp sea salt
  • 2 tsp vanilla
Mix the oats, oat flour, nuts and spices into a large bowl.

In a sauce pan, over mediumish heat, melt butter, brown sugar, honey and water.. Stir stir stir  until it just starts to bubble then remove from heat and add in the sea salt and vanilla. 

Pour the wet mix over the dry and mix it up well. 

Spread the mixture onto a cookie sheet in clumps. You can break it up later too.. but may as well start it out in the cluster sized you want. I use parchment paper as a liner to make life that much easier in all things baking. (if you have never used parchment paper.. you have to.. really you do!) 


Bake for about 15 minutes then stir it up and turn it over. Bake another 5-10 and stir again. Repeat this until you have an even golden brown on all sides. This is the step where you don't want to get distracted or you end up with that extra flavor called.. burned. It may still be a bit soft, but it will harden up as it cools so don't go by the crunch factor, go by the color.
This tray went a little further than I would have liked, but it still tastes great :)

Luckily, I had it on the parchment  so I was able to actually remove the entire thing from the hot tray to stop the cooking. 

That's it! You have now achieved your own cluster chunky granola! Now you can add whatever dried fruit you want and enjoy.


I went one more step because I wanted to bulk it up with the loose type granola too. 


For this I actually followed  this basic granola exactly ( I know right!?) .. oh wait, not EXACTLY.. I used flaxseed oil instead of vegetable.


My add-ins have consisted of dried apples (my own of course), raisins, chopped up dates, dried bananas, and craisins. I have some pineapple that needs to go into the dehydrator today and some coconut that I am going to toast up too. 

Have fun with your own creations! Let me know what your favorite granola mix is. 

Thursday, November 29, 2012

Cooking with Spelt


My mother asked me why is it that people have been eating gluten forever and yet just recently have been having problems. Well, the answer to that is that wheat we are ingesting today is nowhere near what wheat started out to be. 

I am definitely not an expert on it, but I do know that wheat (along with lots of other things) has been manipulated (whether hybridized or genetically modified) to the point that it is no longer the same wheat our ancestors (or even our grandparents) ate.

Anyway, I have been attempting gluten free, but decided to play around with spelt today. What is spelt? Basically, it is the "antique wheat". Click here to read up on it a bit.


So, here is what I did today:

Spelt Banana Spice Cake

2 1/2 cups Spelt Flour
2 1/2 tsp Baking Powder
1/2 tsp Baking Soda
1/2 tsp Salt
2 tsp Cinnamon
1/2 tsp Cloves
1 tsp Nutmeg
1/2 cup Butter
1/2 cup Honey
1/2 cup  Pure Maple Syrup
1/2 cup Brown Sugar
2         Eggs
1 Tbsp Vanilla
3         Large Ripe Bananas, mashed
1         Large Banana, sliced


  • Preheat oven to 375
  • Mix spelt flour, baking powder, baking soda, salt, and spices in a mixing bowl.
  • In a separate bowl, beat butter, honey, brown sugar, maple syrup, vanilla, and eggs with an electric hand mixer until fluffy.
  • Add a third of the bananas and beat well. Follow with a third of the dry ingredients. Repeat until all ingredients are mixed.
  • Pour half the batter in a 9x9, greased baking dish.
  • Place the slices of banana on the batter.
  • Pour the rest of the batter on top of the sliced bananas.
  • Bake for 35 minutes or until a toothpick comes out clean.
  • (I actually ended up turning it down to 350 for a bit to finish it off.. the 8x8x2.5 pan made for a deep cake!)
This cake had RAVE reviews by EVERYONE who tried it.  Most people would take a bite and then their face would show surprise as they tasted it. 

I'm going to try it again as a bread loaf and maybe see if it turns out differently with regular flour.


Never Ending Vanilla Extract

Today I went to try a recipe for Spelt Banana Spice Cake and, of course, the last ingredient to be added is the vanilla. The recipe calls for 1 Tablespoon and I had less than a teaspoon in the bottle!  

I decided this is a great time to start my own vanilla extract. I had read about this a few months ago (if I had started it then, I would have had my own by now..... ).

All you need is some sort of hard liquor (vodka, rum, whiskey) and a vanilla bean!  I had vanilla beans, but alas no liquor. Since I had to go to the store for vanilla anyway and there happens to be a liquor store next door, I stopped in and got a couple of the cheapest nips of vodka I could get.  Just 75 cents a piece for about 2 ounces. Of course I had already torn off the lables when I decided to take a picture.


Anyway, all you need to do in order to make your own Never Ending Vanilla Extract (we will see what the definition of "never" is at some point) is:


  •  take 1 vanilla bean per 4 ounces of liquor (I had 2 halves which worked out perfectly since I had 2 2 ounce bottles ) 
  • Split the bean down the middle (but leave the top and bottom in tact .. so don't split it ALL the way.. just the middle of the middle.. does that make sense?
  • You submerge the vanilla bean in the liquor (make sure it is covered by the liquor at all times
  • Store it in a cool, dark place and shake every few days for at least 6 weeks.The longer you let it stand the more intense the flavor will be.
Now, here is the "Never Ending" part.  You can TOTALLY reuse the vanilla bean! So, start 2 bottles (or start one then in a few weeks start the next) and when you get low on the first bottle, just add more liquor and start the process over again!

The vanilla beans I had were from a recipe that called for only the seeds out of half a bean, so I had one half that had had the seeds scraped out already. I marked the bottles with the date and "new bean" and "old bean" and we will see how it turns out!  


Wednesday, November 28, 2012

And for my next trick... Butter!

You know how proud you get when you make something from scratch? (And I don't mean "scratch the box open"!) 
Well, it's exponentially more exciting when you have not only made the recipe from scratch, but you have also created your own ingredients!

When I made my Quinoa Apple Muffins, I was so proud that I had made my own quinoa flour!  In fact, I ordered a grain grinder to make this process easier!

Well, now I have decided that I will make my own butter. I have made butter before, many times in fact. For a few years when my kids were younger, we had a tradition that for Thanksgiving the kids would make the butter for the meal. It was so easy, just take heavy whipping cream and put it in a baby food jar and let the kids shake it until it turned into butter! I actually prefer the "shake it in a jar" method over the butter churn. 

Since I am getting so very all about the whole "no additives" etc thing, I decided to search out where I might be able to get some whole fat, no additive cream. This lead me to this site where I might be able to get raw milk. 
not my own pic.. that will happen when I do it :)

I have decided to contact Oake Knoll (or is it the Lawton Family Farm) to make an appointment to get raw milk! I'm so excited. In the meantime, it looks like I would just be getting the milk and would then get to go one step further into the "making my own ingredients insanity" and have to make my own heavy cream!

I have sent an email to make an appointment, and I can't wait. I will be able to make, not only my own butter, but heavy cream and buttermilk too!

This will definitely have a follow up blog or two. I was just so excited, I wanted to share right away!

Sunday, November 18, 2012

Easy Peasy Applesauce.. have I mentioned how much I love my food mill?

When I went to make my Quinoa Apple Muffins, the recipe called for applesauce and, of course, I had used up mine just last night. But, have no fear, I have a billion apples in the house right now thanks to the discount produce rack at the supermarket. 

I am not sure what criteria they are using to choose which apples need to go on the discount rack, but I hope they don't change!  I think I have come across maybe 2 apples that even have a bruise on them. They have discounted these amazing apples to .49 cents a pound! All kinds! I am getting honeycrisp, gala, granny, even organic! So, anyway, I have a plethora of apples in the house right now. The dehydrator has been going non stop!

That having been prattled on about, I made applesauce for the recipe and decided perhaps I would share. 

I decided I would just make a small batch since I just needed a half cup for the recipe, but I would make enough to fill the jar I had just washed. 

I used 3 different kinds of apples. Grannysmith, Gala, and an organic Braeburn. I used my apple correr slicer thingymajiggy. This is all I do for when I dehydrate apples too. I don't bother peeling them.


Anyway, here is how I made this batch. I can't really say it's a "recipe" as there isn't really any set proportions. 


  • 3 large apples cored and cut (I don't bother to peel them as I use a food mill to process them which leaves the peels behind)
  • about 1/4 cup water (you really only need a smidget as the apples themselves will usually have enough liquid)
  • about 1/4 cup maple syrup
  • about 1/2 tsp (or so) cinnamon


Core and cut the apples into large chunks. Put them into an appropriately sized sauce pan with water and maple syrup and cinnamon. You can totally use sugar, you can omit any sweetener at all. I actually usually don't use any sweetener as I think the apples are sweet enough. 

Bring to a boil, then lower to a simmer for about 15 minutes until the apples are nice and soft. If you find that there is an excessive amount of liquid, just pour it off (I actually usually save mine and drink it like cider!) Let it cool a bit then I used my food mill to squish it all into applesauce consistency. In the past I have mashed the apples with a masher, used a potato ricer, pushed it through a sieve, and sometimes, just kinda mushed them with a fork and left chunks. 

Applesauce is one of those great things that you can play with as much as you like. You can make it thicker, thinner, smoother, chunkier, blander, spicier. You can add other fruits, leave the peels, pre-peel. You can even make an individual serving by just coring and apple and cook it in a micro safe bowl in the microwave for a couple minutes with a couple tablespoons of water in the bottom of the bowl. After a just 2 minutes (usually) you can take it out and mash it up with the sweetener and spices of your choice.
Have fun with it!


Quinoa flour? What!? My try at Quinoa Apple Muffins

I just LOVE when I make a recipe from scratch, and end up having to make the actual INGREDIENTS from scratch too!

I can't remember now what I was looking for, but came across a recipe for Quinoa Apple Muffins.  I am trying to go the way of gluten free, and so this intrigued me. I have quinoa on my shelf... I have apples... I like muffins... hmmmmmmmmm

Well, the recipe called for quinoa flour. THAT I did NOT have on my shelf, but... I DO have my handy dandy trusty coffee grinder that I use for EVERYTHING!  SOOOOOO I made myself the flour.  The original recipe called for 2 1/2 cups of it, and I really didn't want to use up that much in case it turns out to be like the dandelion soup (a whole story for another day). So, I decided I would halve the recipe. It seems that a half cup of quinoa ends up yielding about 3/4 cup of quinoa flour. 

The recipe also called for applesauce. Of course I used the last of my applesauce just yesterday and had just washed out the jar. That was definitely not a big deal since I have a HUGE supply of apples at the moment. So, I made some applesauce and used 3 different types of apples and maple syrup instead of any sugar. (oh, and for the record, I always only use PURE maple syrup... the other stuff isn't even anything maple .. its just grossness)

The original recipe also said something about how it probably wouldn't rise, and so to fill the tins right to the top. Well, my Acorn Banana Bread raised nicely and that had both baking powder and baking soda in it. This recipe only called for baking soda, so I decided I would add in some baking powder also. 

I think that was the right choice :)


Ok, so here is what the recipe ended up being:

  • ½ cup apple sauce
  • ¼ cup olive oil (original recipe called for vegetable but I don't have any)
  • 1/3 cup PURE maple syrup
  • 2 eggs
  • 1 small grated apple
  • ¼ vanilla
  • 1¼ cup quinoa flour
  • 1 tsp baking powder
  • 1 tsp baking soda
  • ¼ salt
  • ½ tsp cinnamon 

Preheat oven to 350°F/175°C.


Mix together oil and maple syrup. Beat in eggs. Stir in applesauce, grated apple and vanilla.

In a separate bowl, stir together the remaining dry ingredients. Add dry ingredients to wet mixture, and stir by hand until well combined.

Pour into a greased or lined muffin tray 3/4 full. 

Bake for 30 minutes or until an inserted toothpick comes out clean.

So, they rose nicely, the consistency is PERFECT! They are not crumbly or anything!  I think perhaps a smidge more salt maybe, or I might try using butter instead of oil, or half oil, half butter. 

Mom gave it a good review. In fact I had to send her away and tell her she couldn't have anymore!


original recipe

Wednesday, November 7, 2012

Acorn Banana Bread


Acorn Banana Bread

1 cup acorn flour
2 tsp baking powder 
¾ cup corn meal
½ tsp salt 
¼ tsp baking soda 
1/3 cup butter, softened
2 eggs, beaten
3 bananas, mashed
1/3 cup maple syrup 
¼ cup honey


Grease an 8x4 inch loaf pan. Preheat oven to 350° F. 
In medium bowl sift all dry ingredients. Flour, corn meal, baking powder, salt and baking soda.
Mix eggs, butter, bananas and honey in large bowl and slowly add flour mixture and beat until well blended. 
Pour batter into greased loaf pan and bake about 50 minutes to 1 hour, or until toothpick inserted in the center of the loaf comes out clean.


 (You can also use wheat flour instead of acorn flour. Also walnuts or pecans in place of acorns and it’s still delicious).

I used the mix of honey and maple syrup because well, I only had 1/4 cup of honey. So, I think it came out a bit sweeter than a straight honey recipe would. If you are going to use just honey, use 2/3 cup. 

It's a little crumbly, which I believe is because it is gluten free. I might look into adding things such as xantham gum, arrowroot, or.. maybe just another eggwhite!  

I used my mother, my son and one of his friends as taste testers and they all liked it a lot. When the boys were told what it was they were REALLY impressed and said "Well knowing what it is, it REALLY is good!"

Monday, November 5, 2012

Unacceptable Levels

I look forward to seeing this, although I'm sure it is going to be pretty scary! 


Check out their home page at Unacceptable Levels <- click that


Saturday, November 3, 2012

Toothpaste.. it's not just for teeth!

So, one of my friends had posted on Facebook that her husband was going to "polish her headlights ;)" and she posted the product he had purchased. Well, I'm a .. well let's just say I'm frugal and would love to share my frugality with everyone! 

And so was born, the "Polish your headlights with toothpaste" blog!

I remembered that my mother is always complaining that her headlights just aren't bright enough, so in the fading November sunlight (and temperatures!!) I went out to check out if her lenses looked like they were foggy, and lo and behold! They were!

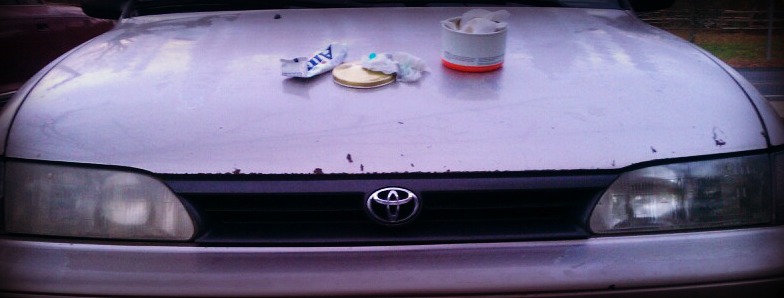
So with some products everyone has at home, it took me about 10 minutes (I kept the time stamp on most of the pictures to show how long it took) to complete! (And I was glad cause it was getting COLD AND DARK out there!) Toothpaste (whatever I had in the medicine cabinet) and wax (I happen to have butchers wax, but you can use anything including furniture spray)

Start out with an old, hazy headlight lens.  I happened to have  a  couple here on my mother's 1994 Toyota Corolla.


Just put some toothpaste on a damp papertowel and .. well.. polish the lens. Ya know, kinda "wax on ~ wax off" style. 


Wipe off the toothpaste, then go over it with actual "wax on ~ wax off"   (which means.. put on the wax.. and then .. polish off the wax.. not just the motion..)
Looks good so far!

Before..... 

After!!


Thanks for the blog idea.. and my mom thanks you too!!